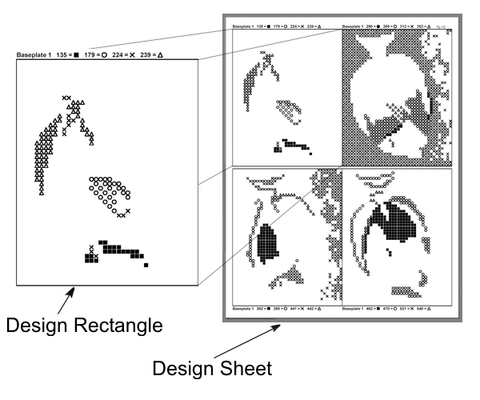
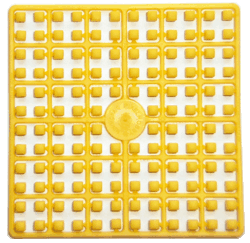
With PixelHobby®, you can create a unique mosaic picture from any image or template. The approximately 2 x 2 mm pixels are placed onto the base plate using tweezers . The printed templates are placed underneath the transparent base plate . Four symbols are marked with color numbers. Using the tweezers, the individual pixel pieces are placed according to the symbols.
Simply load the desired image into the designer and the program will immediately create a preview of the design as a 2x2 plate version.
Download PixelHobby Designer Version 2.0 for Windows© (approx. 7 MB) (we assume no liability for consequences arising from the installation and use of the program)
You can also use the online designer or send us your image and we will create a template for you.
You can change the size and color brilliance, highlight particularly important parts in the foreground, and adjust other details.
Done? Then all you have to do is print out your own template.
Here are a few examples:
|
Original |
Pixel image |
Close-up |
||

|

|
 |
|
Original |
Pixel image |
Close-up |
||

|

|
 |
Once you have printed out the template and the materials list, you can use the materials list to order the corresponding accessories directly from us.
A notice:
You can also send us your order via the designer (offline version only). Please change the recipient email address to info@pixelhobby-shop.de so that the order goes directly to us and not to the Netherlands.
Alternatively, you can purchase the existing templates from our shop.
Start your new hobby!
You need:
Base plate – pixel squares – tweezers – template
And this is how it works: The transparent base plate is placed on the template.

The printed symbols are visible through the base plate . Each symbol is assigned a color. There are four colors per template rectangle. The color is also indicated on the back of the pixel squares , so you always have the right color at hand.

|

|
Now you can use the tweezers to pluck off one pixel at a time and place it on the designated spot on the base plate .
One by one, you place each color completely onto a template rectangle. Once you've placed all four colors, pick up the base plate and place it on the next template rectangle. To populate a base plate , several template rectangles are always placed under the transparent base plate . Pay attention! Before placing the base plate on the next template rectangle, double-check that all symbols have been populated.
Important note: There is a transparent arrow on the back of the base plates . Please ensure that this arrow always points in the same direction to prevent the design from being rotated.
This is how your pixel image is created!